Friday, March 29, 2019

Anza Borrego Desert Motorcycle Road Trip

My neighbor is a motorcycle fanatic as I am, so we decided it was time for a motorcycle camping trip a few weeks back. He recently ended up with a nice Suzuki V-Twin bike and has been personalizing it with some minor repaints, saddle bags, upgrades.
We decided to camp for 2 nights and camp at local desert Hot Springs in the Anza Borrego area.
I decided to ride the old Gold Wing since it had been "down" for a few months with a broken ignition system. The "Dyna" Ignition sensors were replaced a few weeks ago.

We stopped for a quick break at a rest area....a truck driver had the road blocked as he high centered his trailer.


DUH......


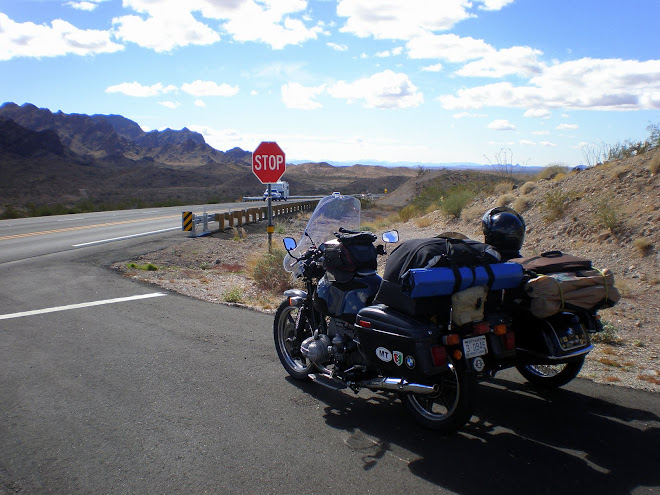
Gold Wing in "travel mode"


We stuck to back roads whenever possible but had to ride 30 miles of Interstate as there was no alternative. Followed the Mexican Border into California.

       A pull off spot along the road....not sure what this "over view" area was.


Border Patrol pull a "Drag" through the sand every day. This obliterates foot prints / tire tracks in the sand so they can monitor "fresh" activity.


Mexico in the distance


Historical Marker


Another "break" along S-2 in the Anza Borrego Desert


 We kept the day's ride fairly short and took a camping spot at Agua Caliente, a San Diego County Park with a Hot Springs. We spend nearly every New Years Eve here with our BMW Airhead Club. We enjoyed the Hot Springs...planned on revisiting in the evening but they closed to pool after 5:00 pm during weekdays....sad.


My riding partner is a true minimalist camper....ground sheet / little wood burning stove. 
I prefer a tent....and when I took it down in the morning a knarly looking huge centipede was under the tent. I've found large scorpions under my tent in the past....I'll keep using the tent!


The Marine Corp had a few choppers in the area. they were busy all night. In the middle of the night, I heard what sounded like a freight train approaching.....all of a sudden a huge blast of wind hit, then subsided as it traveled away. This happened numerous times in the night. My partner's open campsite was blown all over and he ended up moving a few feet for more of a wind break.


Off to an early start on day 2, and ran into a snow flurry on our intended route. Had to reroute our ride. Wasn't going to ride into a snow storm. 


Road side break at Box Canyon


Followed a little faint trail up the hill and it led to a couple of old stone out houses....with a view.


 We altered our route due to inclement weather ahead, I led us on a route which I had never ridden.


The untraveled route ended up being a great twisty road leading to Borrego Springs Ca.


Stopped in Borrego Springs and found a great Mexican Cafe for an early lunch. Also saw a lot of old vintage bikes running around. Later we found that there was a vintage motorcycle gathering that weekend. 

Had a great 3 day ride...I had a few more photos but my camera "lost them" somehow....lol
Planning another short trip this coming weekend....Sunday / Monday. Going to visit a Rail Road Museum!


Monday, March 4, 2019

1981 Yamaha XS 400H Resurrection

I watch the local "Craigslist" on a daily basis since you never know what might show up.
A couple weeks ago someone posted an older Yamaha XS400 for $600.00.
A one owner bike with a mere 2784 original miles on it. The down side was that it has sat dormant for many years with a couple gallons of stale gasoline in the tank.


I went over to look at the bike and ended up making a deal for $500.00. Still has original tires which are as hard as wood. They will need to be replaced prior to riding it more than around the block. 


I immediately removed the carbs and fuel tank. Tank has some rust inside so it was drained and filled with vinegar to try to "cook" some of the rust out. I've used that method in the past but not sure if it will work on this....quite a bit of rust in the tank. I'm soaking it for a week or so and we'll see. My hopes aren't too high with the vinegar method. 
The carbs were a mess. The floats / needle valves were stuck solid with varnished fuel remnants. The CV carb slides were also stuck. I freed the slides using "PB-Blaster" and got them removed. The float pins were another issue. After soaking for 4 days in carb cleaner they still wouldn't budge. I finally resorted to using a small butane torch and applied heat. That did the trick and eventually the float pins and needle valves were removed. 


 Unfortunately I got a little carried away and melted the solder on one of the alloy floats and it came loose from the holder. I was able to re-solder the float back together. The float swivels / pins required some filing / sanding to remove the near "concrete like" varnish. I had some replacement o-rings so used them, but didn't have new float bowl gaskets. Decided to reassemble with the old gaskets for now, they came off easily but are a little stiff. Easy to install new ones at a later date. 


I recently ordered a new oil filter & o-rings o decided to drain the oil today....oil came out fairly clear looking and no major issues seen. The XS400 does have a small inspection plate / oil screen underneath. Haven't decided whether to remove the cover / clean the screen yet. As clean as the oil appeared it is not likely an issue. The oil filter housing thru-bolt is stuck solid so may need to cut it off to remove. I ordered a new Yamaha filter bolt today so will likely sacrifice the original one to remove. So far I've spent about $60.00 on repairs...will need 2 tires and a battery yet. Will also drain the fork legs and replace the fork oil. This model had front / rear drum brakes so no hydraulic brakes to repair. The chain was pretty loose so adjusted it to proper tightness.

UPDATE: The oil filter bolt / pressure tube removal ended up being an "afternoon project"....as it was REALLY "nature welded" into the engine block.   I fit the proper 12 MM "six sided" spanner wrench first off.....then went to a six sided 12 MM socket.....then to a twelve sided 12 MM socket....all slipped while attempting to loosen bolt. In desperation, I "drove" a slightly smaller 7/16" twelve sided socket on the bolt but it slipped also. Then I used a tiny Dremel Cut-off wheel and cut the mangled bolt head off....then drilled a small hole in center of bolt. Three different sized screw extractors were then used in an attempt to loosen the bolt. All simply slipped and gouged out more metal. Finally decided to attempt removal with a cold chisel / hammer. Used a "miter" type Dremel Bit and enlarged the hole, then cut slots in the perimeter so I could use a chisel. Finally was able to "break" the damned thing loose with the chisel. Took about 3 hours total to remove it, but no collateral damage....yay!


The new oil filter bolt / pressure tube is a Yamaha OEM bolt. The replacement uses a larger 17 MM bolt head, rather than the little 12 MM head. I used a bit of "anti-seize" on the threads and did not over tighten.


Bought the cheapest battery I could find at an implement store...$60.00 for a conventional lead acid type battery. 

I rode the bike in the neighborhood a few miles and eventually had a flooding issue with the left carburetor. ...Pulling it apart I found one of the float bulbs full of gas. The solder on a seam must have breached when heating the float pins. Rather than screw with it any longer, I ordered one new float assembly and two new needle valves / seats. Carb removal is now a 15 minute process (practice makes perfect) so no big deal.

Ended up using Apple Cider Vinegar for 5 more days to de-rust the fuel tank. The rust vanished after that time frame. I flushed the tank well, then added some baking soda / water to neutralize. Then added some "Marvel Mystery Oil" and sloshed around. Tank interior came out looking good. I installed an in line fuel filter for insurance to catch any rust remnants which might surface.

This Model Yamaha used a "vacuum operated" fuel tank petcock. These type do not have an "OFF" position, but rather are supposed to shut automatically when engine vacuum ceases. I've had a few of these over the years and without exception, with age, none of them have worked properly. This one is the same, so I added an additional "in line" petcock I had laying around for insurance. I found an exact configuration petcock on eBay, without the vacuum assembly, so maybe I'll buy one at some point.

Done for now.....used some light de-greaser in all hard to access spots and gave the bike a good cleaning. The little windscreen which was on the bike did not fit well so I removed it. I decided to fit it to my /5 BMW.


So now have a grand total of $690.00 invested in the bike, including the purchase price.
I'll definitely keep it for a "rider" for a while....or maybe my Wife might like to ride it. ... Plan on hauling it North to Montana this Spring and I'll license it there. Done for now.


Gila Mtns.

Gila Mtns.